Smartphone Photo Editing: Strategically Create WOW Images - iPhone Android
This post was published 4 years ago. Download links are most likely obsolete. If that's the case, try asking the uploader to re-upload.

Video: .MP4, 1920x1080, 30 fps | Audio: AAC, 44.1kHz, 2ch | Duration: 4h 7m
Genre: eLearning | Language: English | Size: 3.87 GB
Do you:
Lack direction in photo editing
Apply the same 3-4 editing steps
Find yourself relying on favourite filters
Want to get the most out of the photos you capture on your smartphone
Avoid:
Over-editing images to the point that they look fake and unrealistic
Overwhelming subscription desktop photo editing programs
The learning curve of experimenting with different app features and what they do
Downloading countless gimmicky apps that actually destroy the image quality
In just a few weeks, you will be able to:
Feel confident in editing any image – getting the most out of your smartphone
Make your photos tell a story and jump off the screen
Avoid the steep learning curve and overwhelm of desktop editing programs
Edit photos on the go and enthusiastically share the best version instantly
Photo editing without the computer, jargon and technical stuff!
Who has the time or patience to endure the steep learning curve of a complicated desktop program? Especially when most if not all of your images are captured on your smartphone!
This course assumes no prior photography knowledge and is structured in a way to help you 'see' photographically and quickly transition from basic to more advanced photo editing techniques on your smartphone or iPad/tablet device.
Topics covered:
Perspective Tool - straighten and change perspective
Perspective tool corrects lens distortion or to produce a creative look. It offers a Rotate feature that is better than the stand-alone Rotate tool. There are also features to squash and stretch the image, change the viewpoint from side to side.
Cropping - re-compose your image
Cropping is one of my favourite subjects. It is a practical tool to zoom into an image and change the aspect of different printing or posting options. Most importantly cropping helps to recompose an image to better communicate our photo intention, story and creativity.
Related article: Cropping - the most critical step
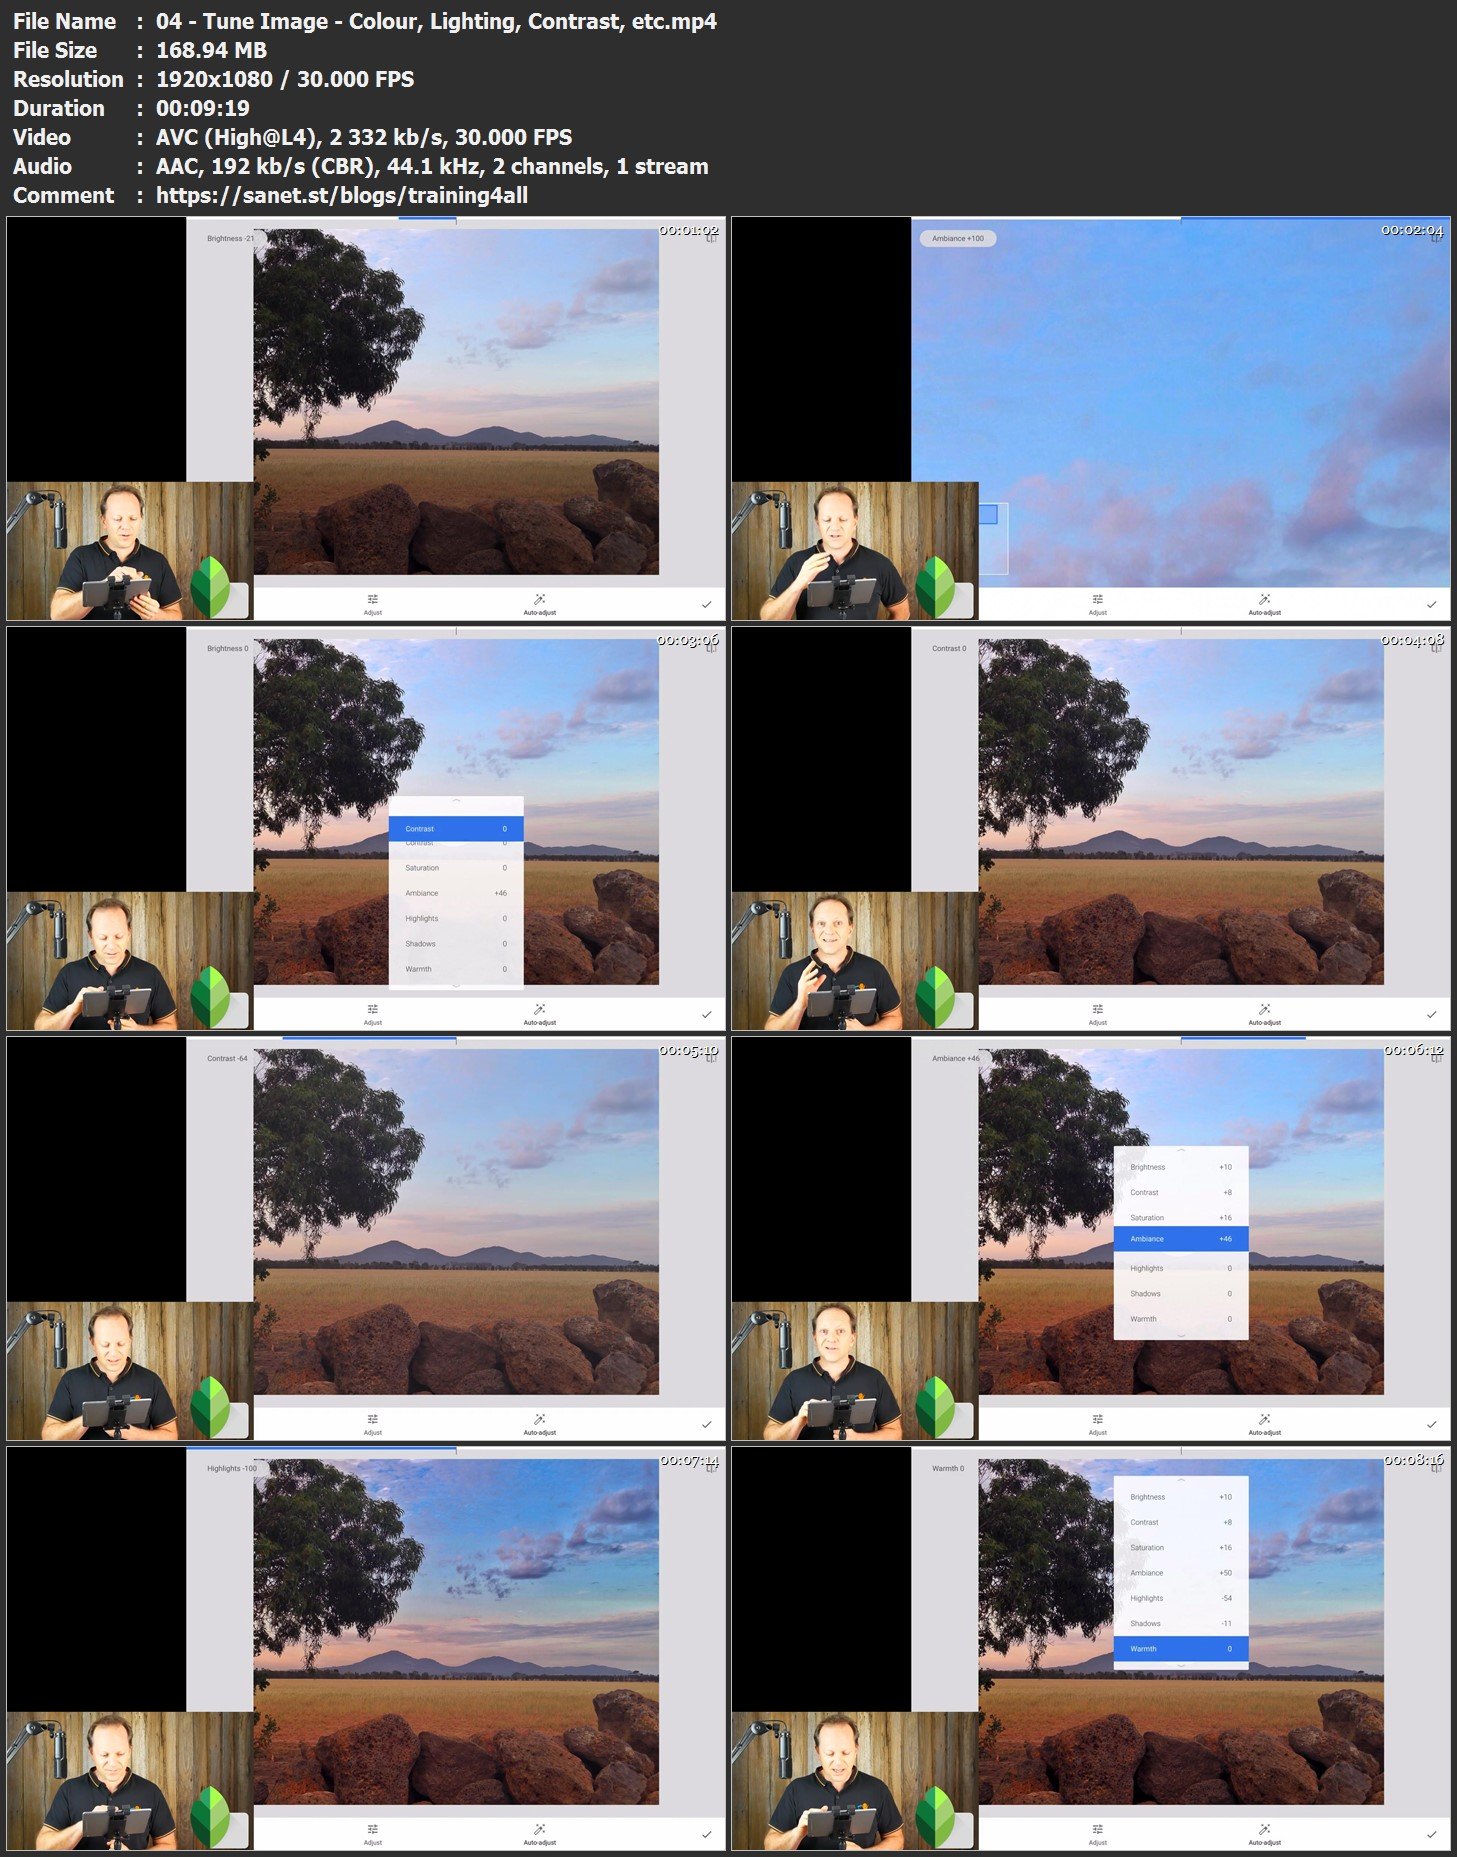
Tune Image to adjust colour, lighting, contrast, etc
Before we get started in the tools within Tune Image, it is important to learn about the histogram first. This is the bar at the bottom left of the screen that you have likely looked over and not paid much attention. Tune Image has all the tools you may already be familiar with in the in-built photo editor on your phone. You will explore what they are and the extras that are found in Snapseed.
Healing - remove distracting elements. Extra tutorial using Retouch App included
If you have not already discovered this, it will truly blow your mind. I am a little excited to show you this. Sometimes there will be distracting elements in your image that you wish you could just remove. Now you can; using Snapseed Healing tool. This lesson includes the separate alternative app Touch Retouch, available on both iOS and Android.
Details Tool - sharpen the image
Sharpening and adding detail to your photos can really make it look like you have had a phone upgrade. Adding sharpness to the image can really make it pop and jump off the screen.
Related article: How to sharpen images and achieve incredible details in Lightroom mobile app
Tonal Contrast - add depth and sharpness
This is one of my favourite features of Snapseed. First of all, a recap of what contrast is. It is the difference between the two things. Increasing contrast increases the difference and vice versa. Imagine a grey line drawn on a piece of white paper. Increasing the contrast will make the edges darker to black and the white, a brighter white. The edge will look super sharp as black against white.
Selective and Brush Tool - area-specific adjustments
One of the big advantages of using an editing app over the in-built editing features of your smartphone is the ability to selectively edit exactly where you want in your photo. You have several options to achieve this. The selective tool will allow you to drop a pin on the image, then increase/decrease the surrounding area that will be affected by your adjustment. The brush tool will affect the areas of the image that you ‘finger paint’.
Lens Blur - add background blur. Extra tutorial using Plus After Focus app
Firstly - why do you add blur to our image? As a viewer, one of the factors that our eye is attracted to – are parts of the image in focus. When you blur the background or edges, it guides the viewer’s attention back to the areas of the image in focus. The Lens Blur tool also has a Vignette feature that provides control over darkening the edges of the image. The combination of having a blur and darkened edges works really well in most images.
Related article: Blur the background on your Android & iPhone photos
Expand tool adds extra sides to your image
The Expand tool allows you to drag out the edge of your photo and have that extra space filled with White, Black or the Smart fill mode. Similar to the Perspective tool, the Smart fill mode looks at the content inside the edge and replicates it in the expanded area.
Snapseed app tips and hacks
Who doesn't love shortcuts and hacks? I have covered most of the individual tips specific to each of the tools in their lessons. There are also some that are universal and apply to almost all the tools. These little hacks will save you time and have you editing even faster!
Versatile Curves tool explained - black, white point and contrast
Warning - This section is a bit technical!! Curves can be an intimidating looking tool. For a long time, I limited my adjustments of brightening, darkening and contrast to just the Tune Image and Tonal Contrast tools. In summary, the curves tool is a powerful tool offering complete control of tones and colours.
Related article: Snapseed Curves tool enhances colour and tones – makes your photos pop
White Balance - correct colour cast issues
The topic of white balance can become quite technical. Thankfully, our smartphone generally does an amazing job of capturing accurate colours. At times, our phone cameras are tricked into capturing colour casts that can be easily fixed in Snapseed.
When and how to create black and white images
Which photos create stunning black and white images? Black and white conversions just do not work on any photo. The best results typically include textures, lines or high contrast (dark shadows and bright highlights). Images that lack contrast will end up a ‘muddy’ grey image. The most impactful black and white images have accentuated blacks and whites, strong composition and intention.
Stacks (layers) and Masking - the hidden most powerful Snapseed featureStacks
One of the hidden and most powerful features in Snapseed is Stacks, also known as Layers in most other editing software. It enables you to delete and re-adjust any Tool or Filter/Look that has been applied to the image. The stacks tool is quite effective to erase and re-adjust previous edits. The incredible power of this feature is the additional option to precisely apply ANY of your previous edits to a specific part of your image.
Double exposure in Snapseed, SuperImpose and Adobe Mix
You have no doubt seen those surreal combinations of multiple images. Double exposure can actually be two or more images blended or superimposed on top of each other to create a combined image. Snapseed has a Double Exposure tool. To be honest, it really is not fantastic. In this lesson, I have included a video highlighting some of the difficulties using this tool. Also included are quick demonstration videos of two other great app alternatives: Superimpose, Adobe Photoshop Mix and PicsArt.
Apply and view the steps in a Style/Look
You may be surprised to hear that I am actually an advocate of filters! They are a great way to discover a new editing process, add a finishing touch to your edit or speed up your editing workflow. Snapseed has 11 filters available, named Looks on iOS devices and Styles on the Android. Most editing apps apply a filter and leave you clueless as to what they did to the image. The only control you have is to reduce the strength and effect of the filter. In Snapseed, you can use the stacks to look at the history of all the edits applied in the style/look
Save your own 'Style / Look and share editing steps via QR Code
Now that you have experimented with the filters (Looks/Styles) provided by Snapseed, it is time to make your own! As you have discovered filters are super quick and easy. If you find yourself repeating the same steps over and over, you can speed up your workflow by creating a filter. You may even like one of the Snapseed filters and want to either increase or decrease one of the steps in the filter. You can then save it as a separate filter and share your editing workflow with someone else using a created QR code.
Colour grading / colour toning using the colour channels in Curves
You previously learned how White Balance can be used to overcome colour casts to the whole image. You will now be exploring colour manipulation for creative purposes. This is often referred to as split-toning, duo-toning and colour grading. A colour cast can create a particular style and mood in your photos. This process is very common in cinematography to create a mood.
HDR Scape filter
HDR is High Dynamic Range. The dynamic range refers to the spectrum of light and dark areas. The human eye can see three to five times more range of light than a single image captured by a smartphone. When a smartphone camera has the HDR mode enabled, it will capture multiple images of the bright and dark areas and then blend the best of each image into one image. The end result is a more aesthetically appealing image that has a more balanced exposure, reduced contrast without becoming flat and lacking in vibrancy.
What is the Grunge filter?
If like me, you struggle to create abstract photography – this is the filter for us. This filter adds textures, blur, vignette and a range of colour tones. You can also create a monochrome photo using the Grunge filter. This is effectively a black and white image having a single colour cast. You may be familiar with Sepia mages. This burnt, warm effect creates a timeless and charming feeling to the image. This technique is also often used to minimise distractions within an image.
My 6-step photo editing process for any image
This process is designed to keep it simple for you and make just the basic enhancements in a systematic order to make the most efficient and effective transformation of your image. For example, there is no point making a particular area of your photo look amazing to then go and crop it out in the next step. I use this process on most of my editing as a starting point before then moving onto a specific area (local) adjustments and other tools that will specifically benefit the individual photo.
Related article: Six-step Snapseed photo editing process on your smartphone
Nature - waterfall photo editing example
This image was captured on an iPhone X using camera replacement app Slow Shutter Cam to create the long exposure effect. You will notice the original image is deliberately captured a little dark. This was intentional to avoid the white areas becoming pure white and losing all data in the image.
Note: Original image added as a resource
Travel, Holiday - beach photo editing example
This image was captured on an old iPhone 6s. This provides challenges around image resolution and a limited dynamic range of light and dark. This demonstration will show you have to create something lovely out of a basic snapshot.
Food photo editing example
This overhead shot was captured under natural lighting from the side. No fancy set up, just a snapshot. At the time of the capture, the colours and texture were the motivation for the image. During the edit, we want to emphasise this and make the textures jump off the screen.
Group photo editing example
You often take photos of family, friends and loved ones as a group. Our phones do an amazing job of exposing and focusing on the faces really nicely. You may even take photos at events, in your travel or your business. Sometimes, your phone may struggle under a range of circumstances; including low light, distance people facing away, immovable background distractions or lens distortion.
Homepage
Screenshots
Bookmark my blog to get more stuff every day!
Newest course ==>> Training for all <<== Newest course
Latest OS ===>> Share for Progressive <<=== Latest OS
Huge book blog ====>> Books <<==== Huge book blog
Download from free file storage
Resolve the captcha to access the links!
Registered members don't get captcha ... just sayin